Proud partner

Proud partner
Article

Screaming Frog is the best-known website crawler and is ideal for carrying out technical checks. After just a few minutes of crawling, the programme already identifies dozens of areas for optimisation, ranging from missing H1 tags and 404 errors to incorrect HREFlang attributes. However, Screaming Frog has countless other features that go far beyond a simple technical check. Sometimes these are handy little tricks, such as searching for UA codes, but you can also, for example, scan a site’s backend. The potential applications of our favourite tool are almost endless, but here’s a handy overview of some useful features and advanced applications.
There are many tools available that allow you to check whether the UA code is correctly set up on a page. This is important because, if the UA code is not set up correctly, the figures will not be tracked accurately in Google Analytics. However, these tools only ever check the location of the UA code on a single page at a time. With Screaming Frog, you can check the code on all pages of your website simultaneously, which has two major advantages. Firstly, it saves a lot of time compared to checking the pages one by one. Secondly, it is much less prone to errors, as the checking process is automated.
First, look up your website’s UA code, which is listed in GA and can also be found in the source code of your homepage. Next, open SF and click on ‘Configuration’ in the top-left corner. Select ‘Custom’ and then ‘Search’. You will then see the field shown below, into which you should paste your UA code. It is important to create one filter for pages with the UA code and another filter for pages without it.

You can now start the crawl. Once it’s finished, go to the ‘Custom’ tab. You’ll find this in the menu on the right, or in the header menu at the top. Fortunately, it’s all explained clearly on the Traffic Today website!

Orphan pages are pages that have no inbound links. It is therefore impossible to reach the page by clicking on links within the site. The only way to access an orphan page is to enter the direct URL. This makes it very difficult for Google to index these pages. In fact, if the page isn’t listed in your sitemap.xml either, it won’t be recognised at all. Even if your page is listed in the sitemap.xml but has no internal links, indexing becomes very difficult.
Crawlers work by clicking on every link on a page and then seeing where they end up. As the orphan page has no inbound links, Googlebot will never reach it, crawl it or index it. Screaming Frog’s crawler works in the same way.
However, SF can identify orphan pages. This requires quite a bit of configuration, so bear with us.
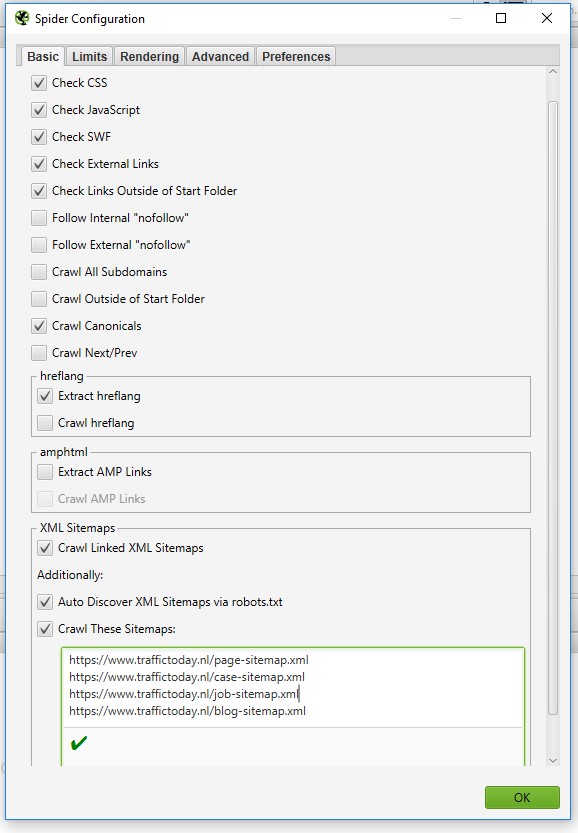
Under ‘Configuration’ and then the first option ‘Spider’. You’ll be taken to the screen shown below. Tick ‘Crawl These Sitemaps’, and enter the URLs of all your sitemaps in the box.
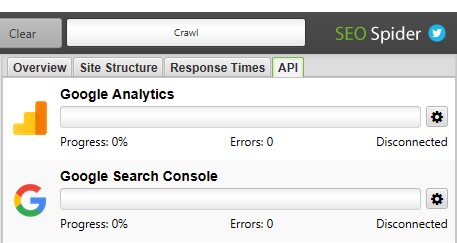
Under ‘Configuration’, you’ll find ‘API Access’. Here, you can connect GA and GSC to SF. Of course, it’s important that you already have access to both Google programmes.

The reason for adding the Google programmes anyway is that orphan pages can still receive clicks from direct links. If that is the case, Google picks this up, and the URLs appear in GSC. In that case, Screaming Frog can detect the URLs. It is important, however, that when configuring both GA and GSC in Screaming Frog, you tick the ‘Crawl new URLs’ box as an additional setting.

Once you’ve set up your sitemap, Google Analytics and Google Search Console, you can finally crawl the website. On the right, in the ‘API’ tab, you can see whether GA and GSC are being crawled correctly.
Since Screaming Frog version 10.0, the Crawl Analysis feature has been available – a highly useful tool that delves even deeper into the website after crawling.
When configuring the Crawl Analysis, it is now important to tick the ‘Search Console’ option.

Once the Crawl Analysis has been carried out, you can finally identify your Orphan Pages. It may seem laborious, but it is still the best way. It is certainly worth the effort, as Orphan Pages can add significant value to your website once they are correctly integrated into the site.
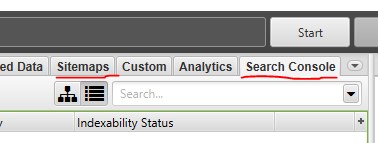
Once the Crawl Analysis has been completed, you can find the Orphan Pages under the Sitemaps and Search Console tabs.
An HSTS Policy is a setting on a hosting server that forces all traffic to connect to a website via a secure HTTPS connection. When a website as a whole switches from HTTP to HTTPS, an HSTS redirect is often used. If implemented correctly, this is more secure than a 301 redirect. This is because a 301 redirect can be bypassed by a malicious individual, who can then still visit the HTTP version of the site. If a page has an HSTS redirect, it is impossible to visit the old HTTP version. That is why it is important to ensure that the transition from HTTP to HTTPS is properly implemented on every page. If, after the transition, HTTP pages or content elements remain accessible, this constitutes a security risk.
After the first visit to a site, an HSTS redirect is not triggered by the server, but is recognised in advance by the browser. Once the site has been visited, the browser remembers that an HSTS policy is in effect. For this reason, it is impossible to visit the old HTTP version of the page. However, a standard site-wide 301 redirect must still be implemented. This is because HSTS only works if the block that is triggered – preventing visitors from accessing the HTTP version – is sent over an HTTPS connection.
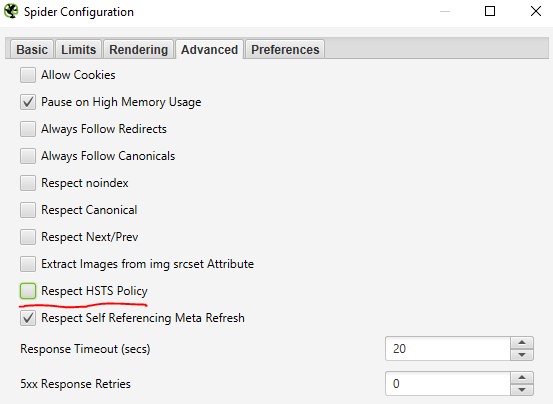
Screaming Frog has a feature to override the HSTS policy. When this feature is enabled, the tool checks whether the underlying 301 redirect from HTTP to HTTPS is working correctly.
You can do this by unchecking the ‘Respect HSTS Policy’ box in the Spider Configuration.
Screaming Frog crawls a website in as similar a way as possible to Googlebot. As a website owner, you can build a beautifully structured menu, but if Google doesn’t follow it, it won’t work.
With the Crawl Path Report, you can find out which links Screaming Frog used to reach a page. If this is not what you want, you can then take action to change it.
You can access the Crawl Path Report by right-clicking on a URL.

Regex, or Regular Expressions, is a sequence of characters that defines a search pattern, primarily used for searching (and replacing) within files or databases. Regex is used, for example, in Google Analytics to match URLs and to support ‘Find and replace’ in the most popular text editors such as Notepad++, Brackets, Google Docs and Microsoft Word.
Example: regular expression for an email address:
^ ([a-zA-Z0-9 _ – .] +) @ ([A-zA-Z0-9 _ – .] +) . ([A-zA -Z] {2,5}) $
The regular expression above can be used to check whether a particular string of characters is an email address or not.
Regex is one of the most powerful methods for speeding up your SEO work. Suppose you have a list of URLs and you only want to keep the domain names from this list. You can easily remove the ‘HTTP’ and ‘WWW’ using the ‘search and replace’ function in your text editor, but how do you remove the filenames and subfolders that come after the ‘/’?
This is very easy with Regex! Using the Regex wildcard (/*), you can remove the slash and everything that follows it. In this way, with a simple operation, you’ve cleaned up an entire list that would otherwise have taken you many hours to do manually. This is a simple example, but the possibilities with Regex are vast.
Regex can also be used in Screaming Frog. In this article, we’ll look at two ways to use Regex in conjunction with Screaming Frog:
Regex can be used to tell Screaming Frog which URLs should be included in the crawl list and what output Screaming Frog should generate. For example: we want to crawl all the blog posts on traffictoday.nl/en and display them as output.
In this case, we only want to include URLs containing /blog/ in our list.
Enter the following in the ‘include’ field:
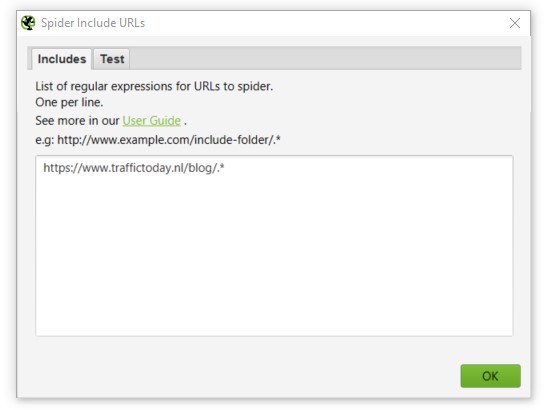
We click ‘OK’ and let Screaming Frog start crawling the website. This produces the following output:
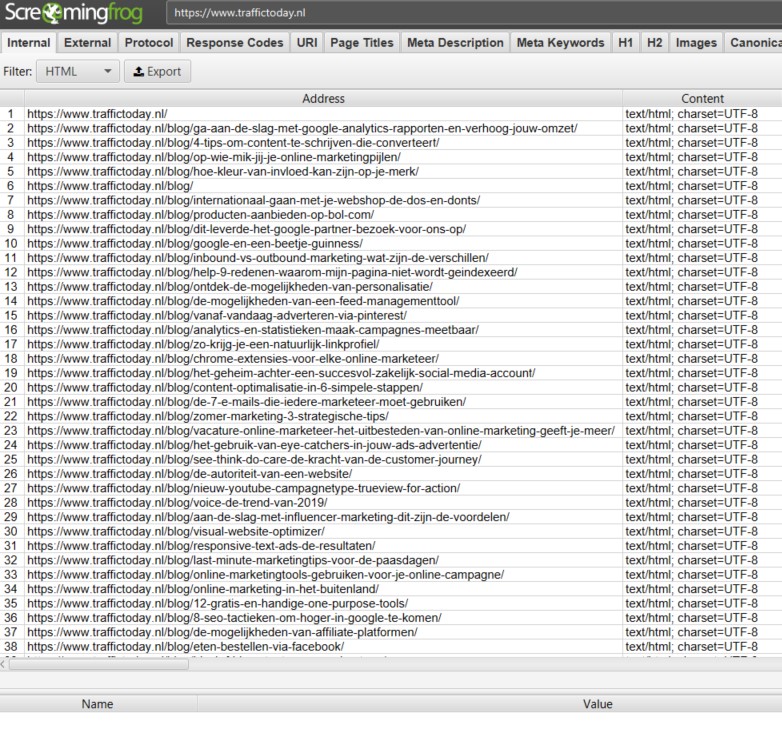
In this simple way, we have ensured that only the blog posts are displayed as output. You can still use regular expressions (Regex) for many other purposes, such as: excluding or including subdomains and excluding or including parameters in URLs.
Screaming Frog automatically retrieves a lot of important data such as page titles, H1 elements, canonical tags, etc. But what if you want to extract other data from your crawls? With Custom Extraction and Regex, you can programme Screaming Frog to extract virtually any piece of content or code from a website. To use this feature in Screaming Frog, go to Configuration > Custom > Extraction.
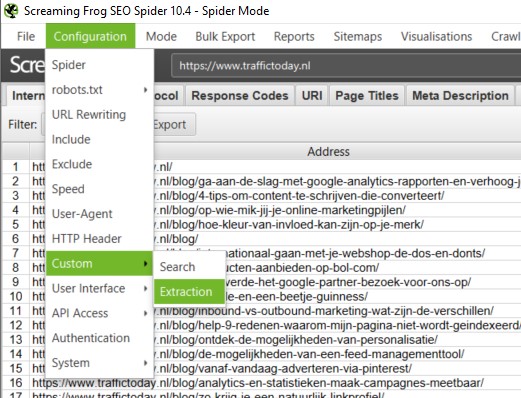
You can then configure the extraction rules. The following settings can be configured:
Once everything has been set up and you have run the crawl, you will find the data you have retrieved under the ‘custom’ tab, where you have selected ‘extraction’ as the filter.
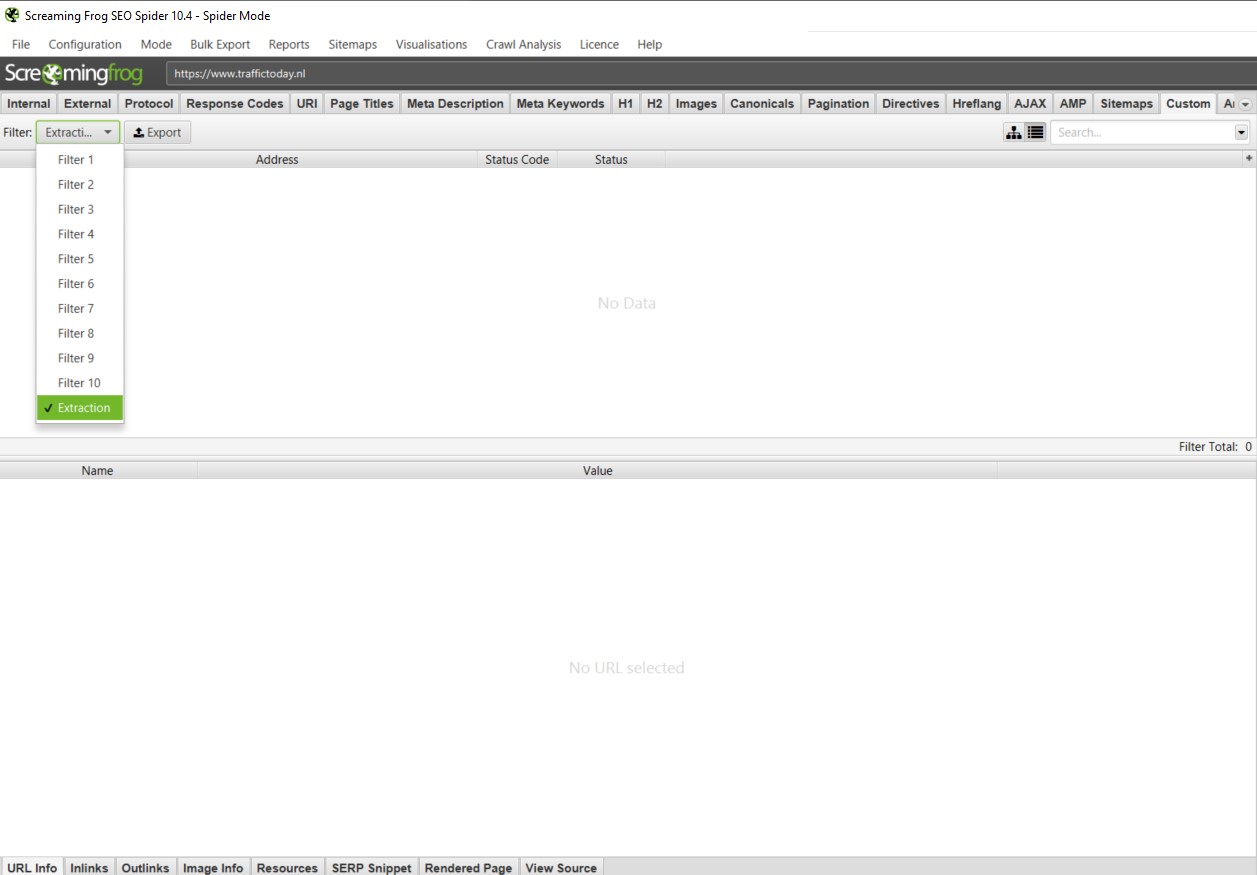
Use XPath to scrape an HTML element from a web page. If you want to scrape information from a div, span, p, heading tag or indeed any other HTML element, use XPath.
Google Chrome has a feature that makes it easier to find the XPath location. Using the Inspect tool, you can right-click on any element and copy the XPath location.
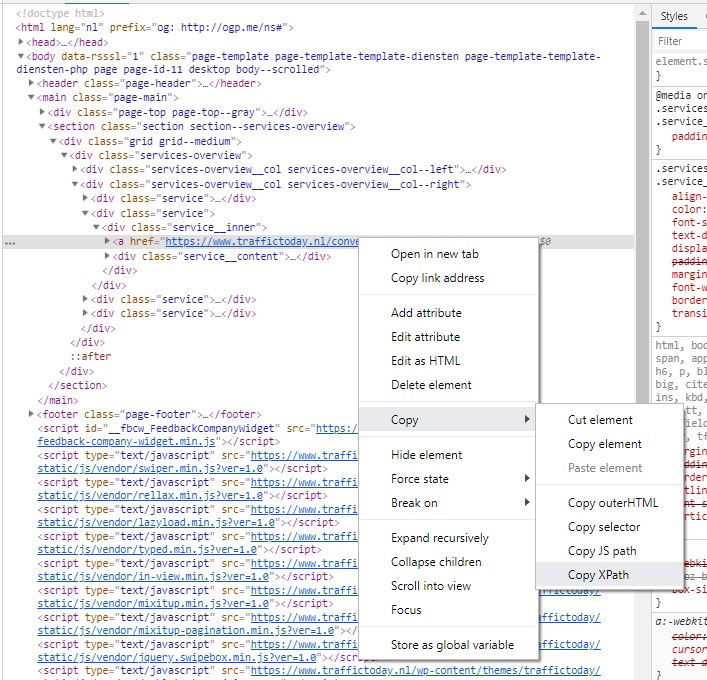
You can then enter this location into the Custom Extraction window in Screaming Frog and let the spider do its job.
Would you like some inspiration on what you can scrape using Xpath? Find some examples here
In the Custom Extraction window, you can also select Regex. Whilst you can easily scrape HTML using XPath, it is not possible to retrieve JavaScript using this method. With Regex, for example, it is possible to retrieve schema markup in JSON format. It is also possible to retrieve data from tracking scripts, such as a Google Analytics tracking ID.
Screaming Frog provides a few examples of how to use Regex for Custom Extraction.
Click here for the examples provided by Screaming Frog.
Screaming Frog is an indispensable tool in any online marketer’s arsenal and offers endless possibilities for analysing websites down to the smallest detail. We hope that by reading this blog on advanced applications, you’ll discover even more features that you can apply during your daily analysis and optimisation work!



Our team is
ready to help you